

How To Add Shapes In Illustrator
7 tips for using textures in Illustrator
There will always be a certain charm and beauty to traditional illustration. The grains from a pencil line, paint smudges bleeding across the textured paper, the imperfect paint strokes... But as much as I admire traditional techniques, I can't help but have in the back of my mind the super amazing tool: Undo, Ctrl+Alt+Z. That's where textures come into my illustrations.
I absolutely love using traditional media to illustrate, but being in an ever growing digital world I have adapted, using the speedy tools which Illustrator brings.
I like mixing them up a bit and actually creating more hand drawn styles with digital paintbrushes and textures. I still get to draw by hand, but having the mix of traditional and digital throughout my illustrations adds another dimension to my final work.
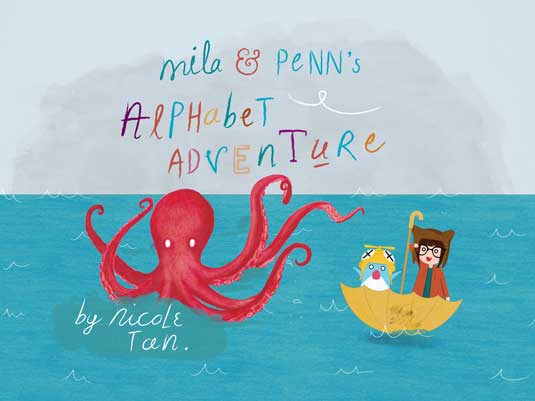
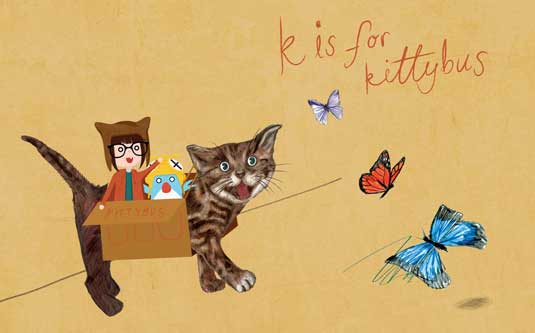
While illustrating the childen's Mila & Penn's Alphabet Adventure, I thoroughly enjoyed exploring different techniques on how I could mingle the two looks I had previously done.
I loved the hand drawn look but digitally drawn versions allowed me to control and play with composition a lot easier and faster. I wanted to recreate the hand drawn feel within my illustrations. I introduced subtle textures and brushes and that created more warmth to the characters.
So how do you go about incorporating different textures into your designs? Here are my top tips...
01. Create a library
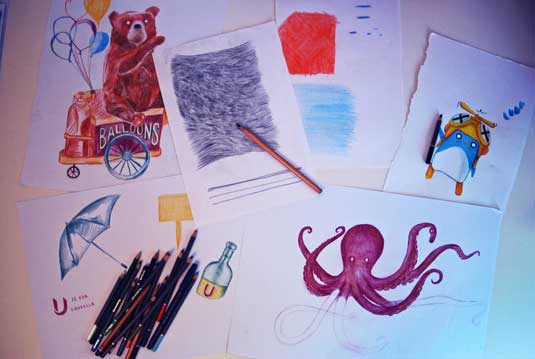
Creating a really, really big library, full of a variety of different textures, really gets the ball rolling. It can contain absolutely anything and how much of it you use on any given project doesn't matter - most of it will surely come in handy at some point.
02. Collect everything
Start collecting scraps of different papers, materials and fabrics like wrapping paper, brown envelopes, newspaper, patterned fabrics and so on. Photograph textures on your daily outings like: concrete, brick walls, wood, trees.
03. Create your own
Create your own textures using watercolour paints, acrylic paints, pastels, crayons, pencil, biro... whatever comes naturally. Use pencil and chalks to create rubbings of different surfaces like a wooden surface or outdoor flooring. You'll be surprised what kind of results you end up with.
04. Keep a folder
After venturing around with textures keep them all in a physical folder. It's good to be organised digitally too: scan them all in and make sure they are high quality scans to avoid problems later on.
05. Do some experimenting
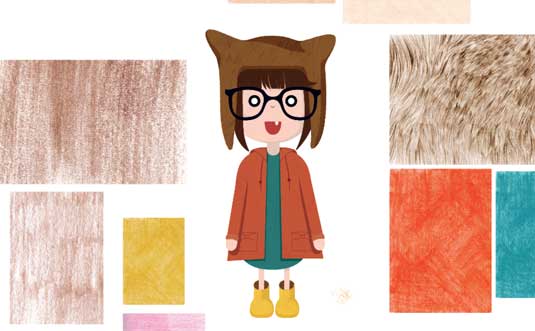
When using my textures, I like to do a lot of experimenting before I settle on the result. I work completely in Adobe Illustrator, but some prefer Photoshop to work with textures. I import the textures into Illustrator and rasterize the files, which allows me to add them to the swatches.
I often complete my illustration before adding the textures. I layer the textures up by copy and pasting the vector shapes directly on top of each other and adding the texture on top of the original colour. This way, I can create subtle textures like adding the texture and playing with the blending modes like multiply and colour burn.
I usually put the layers on 10% to 40% opacity depending how dark the colour is. Having the opacity low gives a subtle texture to your illustrations and adds to it rather than overpowering it.
06. Brush your textures
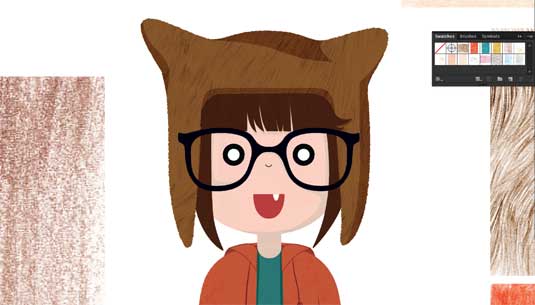
I outline most of my illustrations in different paint and chalk textures. There are a lot of brushes out there that you can download but I'm pretty happy with the library that comes with Adobe.
I usually have them as 1pt depending on the size and this gives a subtle texture as though it's been drawn by hand. I think this adds the slight style of imperfection and character.
07. There is no right or wrong
There are many different ways to apply textures and there's no right or wrong way. The best thing to do is experiment like crazy and see what works. We'd love to hear how you use textures in your work, so please share your experiences in the comments below.
Words: Nicole Tan
Nicole Tan is a London-based graphic designer and illustrator. The interactive storybook app of Mila & Penn's Alphabet Adventure is available on iTunes.
Related articles
How To Add Shapes In Illustrator
Source: https://www.creativebloq.com/adobe/7-tips-using-textures-illustrator-31410998
Posted by: muhammadreepeemsess.blogspot.com
0 Response to "How To Add Shapes In Illustrator"
Post a Comment